text to speech tutorials
How to Add Text to Speech Play Button to Blogger
Blogger is one of the most popular blogging platforms that allows users to create and manage a blog without any coding skills. While Blogger is known for its user-friendliness, you can further increase its accessibility and engagement by adding a widget like WebsiteVoice’s text-to-speech play button.

WebsiteVoice is a simple and easy-to-install TTS solution that allows you to convert website content into audio. So, by adding the WebsiteVoice play button widget to your Blogger site, you can let your users listen to your website content.
In this guide, we’ll discuss how you can add text-to-speech functionality to Blogger with WebsiteVoice.
Step-by-Step Guide to Add Text-to-Speech Play Button to Blogger
Follow these quick steps to add the TTS play button to Blogger websites:
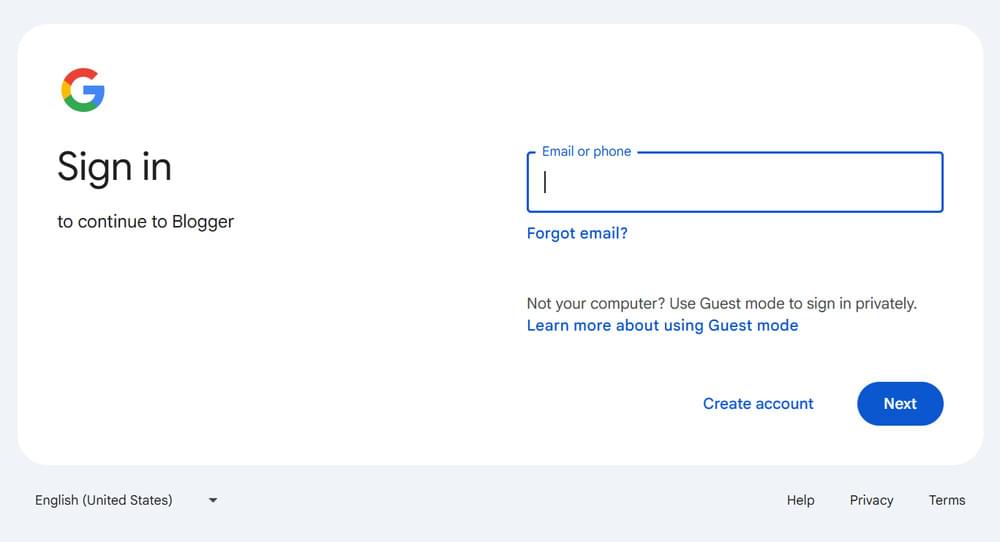
1. Open Blogger and log in to your Google account.
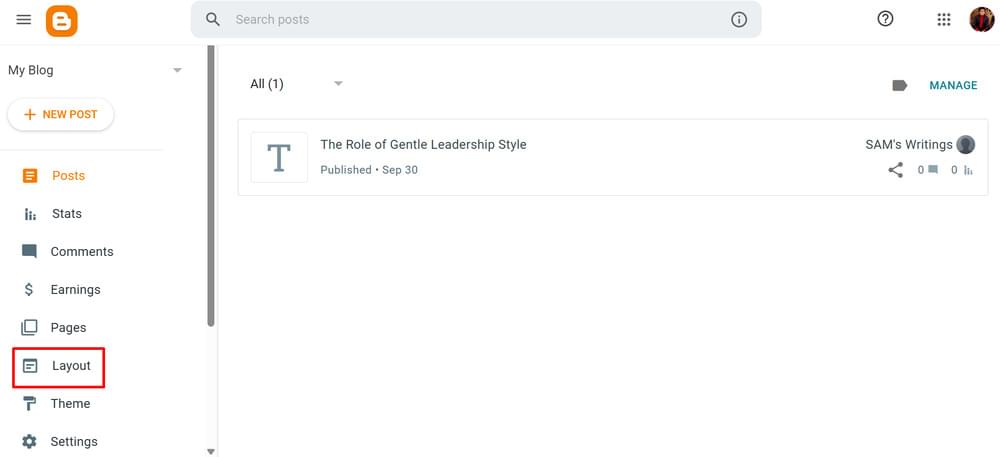
2. On the Blogger dashboard, you have multiple settings and options to manage your blog. When you are trying to add the text-to-speech widget play button to your blog, you have to open the Layout section.
3. On the Layout dashboard, click on the Add a Gadget option.
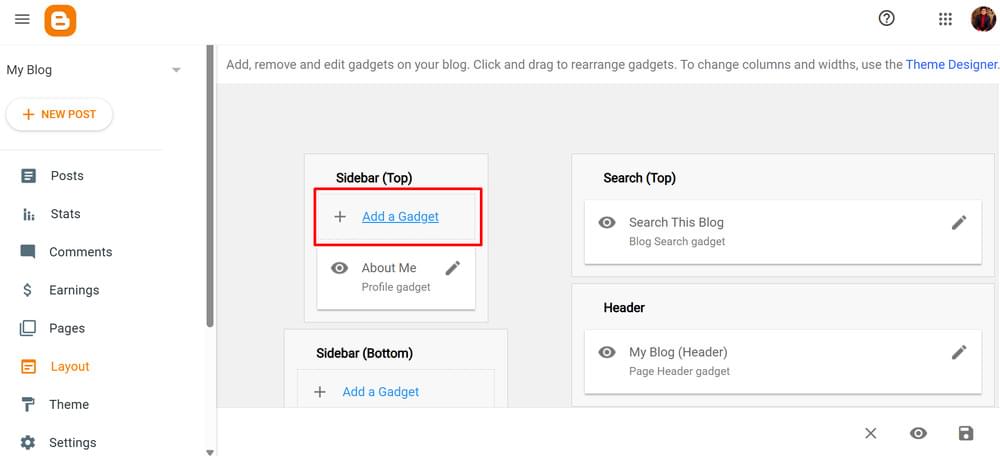
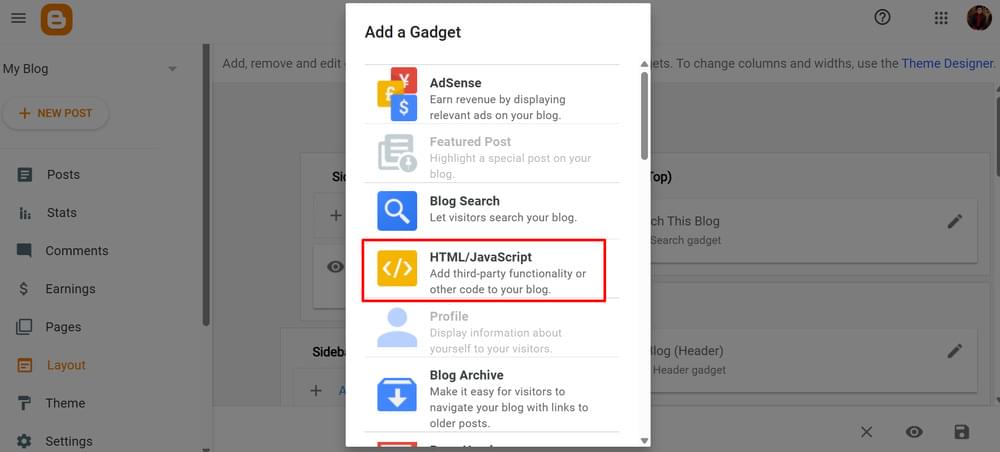
4. There are multiple options to integrate third-party tools like WebsiteVoice’s TTS play button. Choose the HTML/JavaScript option because WebsiteVoice’s widget is available in the form of JavaScript API code.
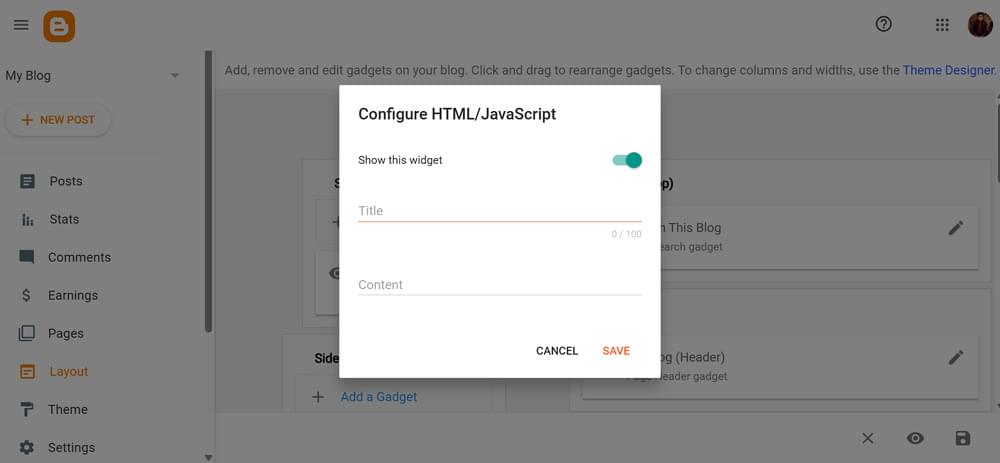
5. Now you have to add the Title and Content to activate the text-to-speech widget. You’ll get this information from WebsiteVoice dashboard.

6. So, open WebsiteVoice’s dashboard in a separate tab to easily copy/paste the information. If you don’t have an account, you can easily start with a 14-day free trial.
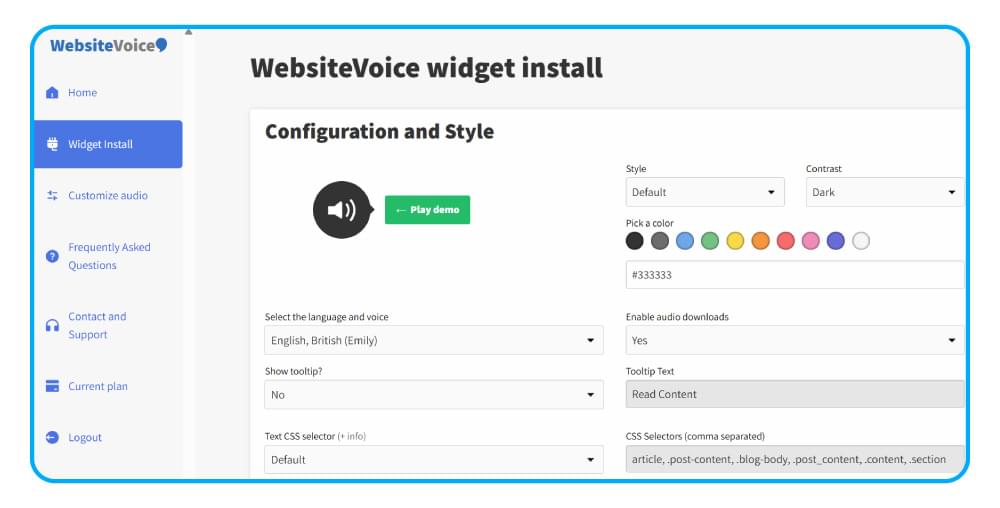
You can also configure and customize the play button via different options, such as:
- Choosing the right language and voice. There are 60+ realistic AI voices covering 35+ languages and accents.
- Customizing the style and color of the TTS play button.
- Enable the option of downloading website content in a listenable audio format by subscribing to the Professional plan
- Add custom outro/intro messages
7. Once configured, scroll down and copy the JavaScript text-to-speech code for your Blogger site.
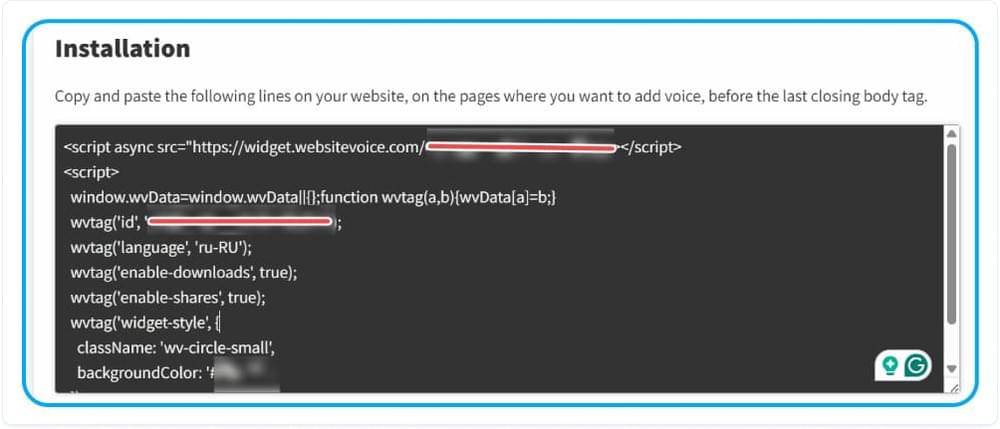
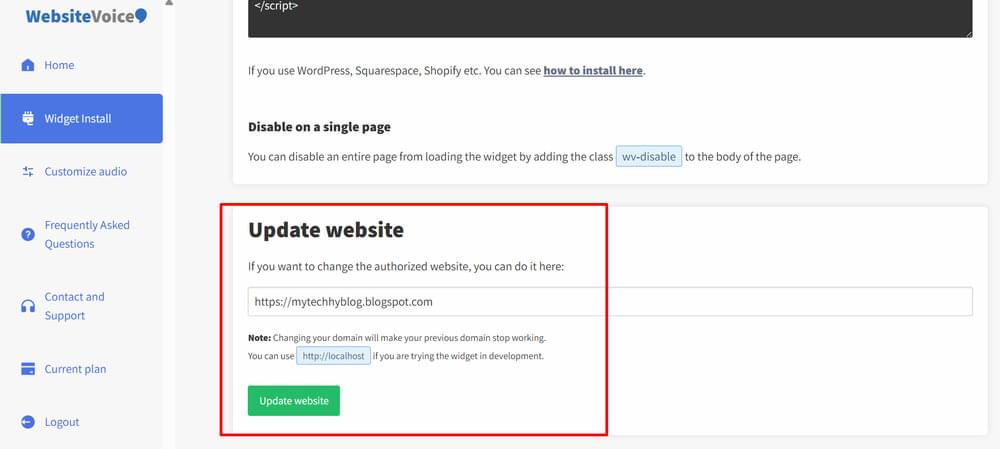
8. Add your Blogger URL in the Update website section to ensure the WebsiteVoice text-to-speech widget is authorized to integrate with your blog.
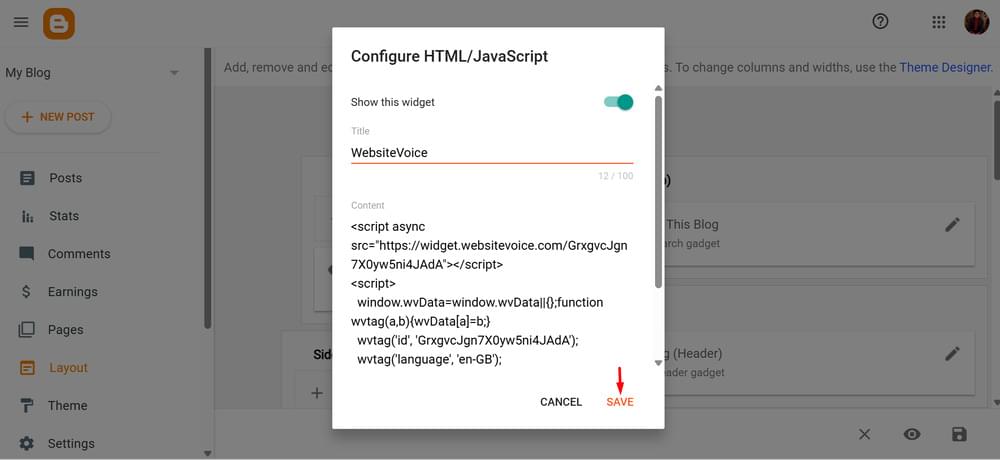
9. Now, go back to the Blogger tab and paste the copied code. You can write anything in the title, such as WebsiteVoice, and click Save.
10. Drag-and-drop WebsiteVoice gadget from sidebar to Header section below My Blog
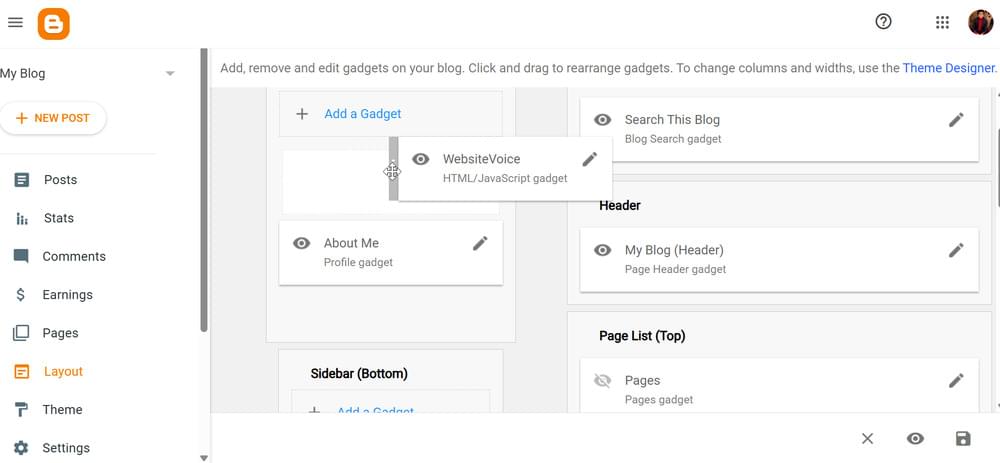
Like this:

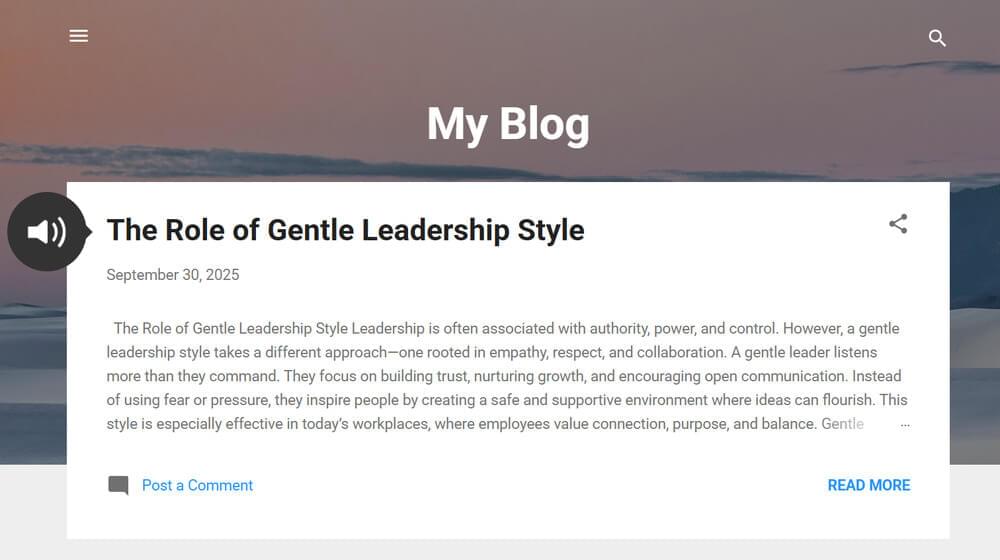
If you have followed all the steps correctly, the play button will now be activated on your Blogger website, and users will be able to listen to the written content.
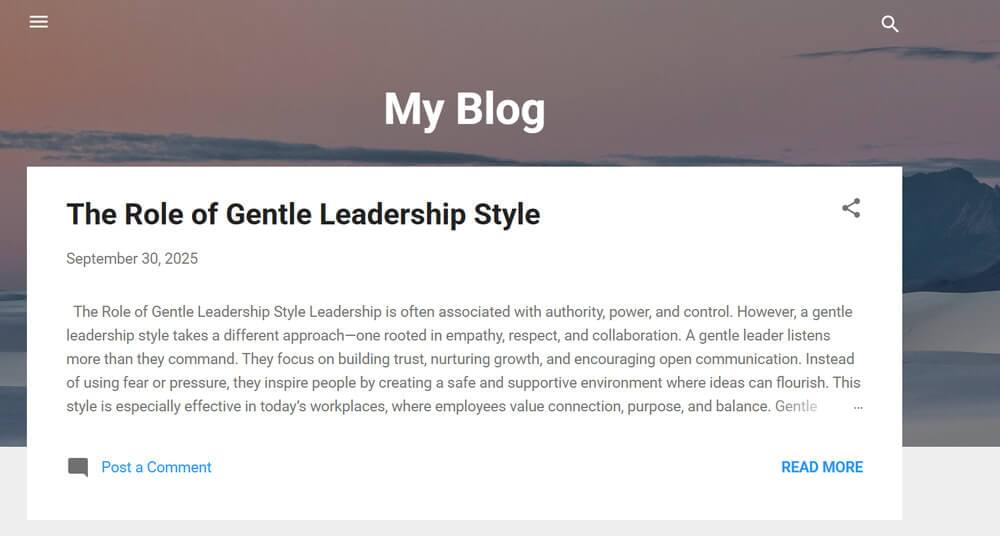
Your Blogger website would have looked something like this before adding the WebsiteVoice widget code:
After adding the widget, the play button will appear, so users can listen to the content instead of reading it.
Conclusion
Adding a text-to-speech play button to Blogger with WebsiteVoice is quite simple by following the steps discussed above. The entire process can be completed within a few minutes and take your website’s reach, engagement, and accessibility to the next level.
If you face any issue in integrating WebsiteVoice with your site or need more information, get in touch with your reliable customer support.
Related: Getting Started with WebsiteVoice Add TTS to Your Website


